


Nothing is more frustrating than dealing with a garage door malfunction just when you are about to start a busy day. In most cases, the garage door refuses to close or respond even when you press the remote button.
The opener light blinks, and the door starts to lower, but then suddenly jerks back up. This is one of the most common issues reported by homeowners needing garage door repairs.
But did you know that a few garage door sensor troubleshooting steps can fix many of these problems? A simple five-minute fix can save you a great deal of money and stress. In this blog, we will take a look at some of the most common garage door sensor problems, explain why the sensors fail in the first place, and show you how to keep them working over the long term.
| For Garage Door Repair And Services At Affordable Prices – Call (209) 484-8977 |
Common Causes of Garage Door Sensor Problems
Below are the most common causes of sensor issues encountered during garage door sensor troubleshooting:
1. Sensor Misalignment
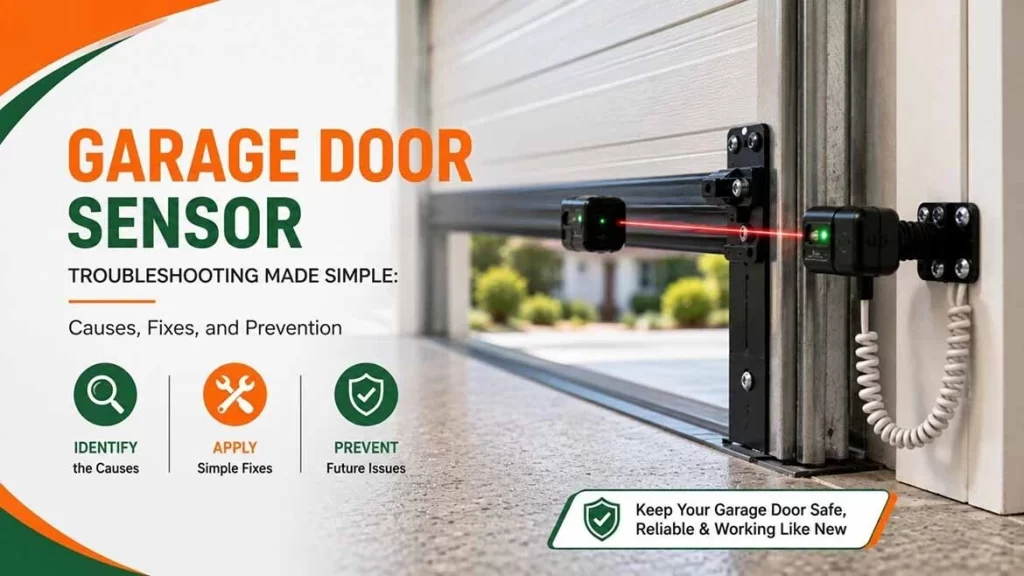
Misalignment is one of the main reasons garage door sensors stop working. As the sensors must point directly at each other for the infrared beam to connect, even a slight bump can knock a sensor out of position.
Misalignment can easily be spotted when one sensor light is blinking or completely off instead of remaining steady.
2. Dirt and Debris on Sensor Lenses
Dust, dirt, spiderwebs, and leaves can easily accumulate on sensor lenses and block the infrared beam. However, this is one of the simplest problems to fix during garage door sensor troubleshooting, yet it is also one of the most commonly overlooked.
3. Wiring Issues
Low-voltage wiring connects the garage door sensors to the opener motor and can get damaged over time. Some reasons for this include vibration from daily operation, moisture, staples pressing into wires, or even rodents chewing on the insulation. Random flickering of the sensor lights can indicate a wiring issue.
4. Power Supply Problems
At times, the problem is not the sensor but the power supply, such as a blown fuse, tripped circuit breaker, or unplugged opener. During garage door inspection, be sure to check that the circuit breaker has not tripped and that the opener is plugged in.
5. Sunlight Interference
Direct sunlight, especially during the morning or late afternoon, can interfere with the receiving sensor. Sunlight interference can cause the garage door to behave unpredictably.
6. Obstructions in the Beam Path
At times, something may be obstructing the infrared beam. Therefore, be sure to check for obstructions during garage door inspection.
How to Fix Garage Door Sensor Problems Step by Step
Here is a simple process for fixing sensor issues during garage door repair –
Step 1 – Check for Obstructions
Start with the basics by looking at the space between the two sensors to see if anything is blocking the beam. Move any obstruction out of the way and try closing the door again.
Step 2 – Clean the Sensor Lenses
Wipe both sensor lenses regularly with a soft, dry cloth. After that, try slowly closing the door again. This should be a basic part of your regular garage door sensor troubleshooting routine. A quick wipe can make all the difference.
Step 3 – Check the Sensor Lights
Check the small LED lights on both sensors. Usually, one sensor has a steady light to show it has power. But the other sensor indicates whether it is receiving the beam. If both lights are steady, your sensors may be aligned and working. However, a blinking sensor light may mean the beam is not reaching it, and if both lights are off, check the power to the opener first.
Step 4 – Realign the Sensors
Align the sensor by first loosening the wing nut or screw on the bracket just enough to allow you to move the sensor by hand. Once that is done, align the sensor until its indicator light remains steady. Be careful not to tighten the bracket too much, as this could twist it and throw the sensor out of alignment.
The main goal is to achieve a stable beam connection. Even if your garage floor is uneven, the sensors do not always need to be at exactly the same height, as long as they are properly aligned with each other.
Step 5 – Check the Wiring
Check the sensor wiring. If you find any damaged wires, they may need to be repaired or replaced by a professional.
Step 6 – Address Sunlight Interference
If you discover that your garage door refuses to work only at certain times of the day, sunlight may be interfering with the receiving sensor. This can be fixed by shading the sensor or adjusting its position.
Step 7 – Test the Door
Once you have solved the issue related to the sensor of your garage door, you should test the operation of your door using the remote control or the wall switch.
Preventing Garage Door Sensor Problems
Prevention is the most effective and simple step you can take to avoid a garage door repair. Here’s what you can do –
- Clean Sensor Lenses Regularly
- Keep the Area Around Sensors Clear
- Check Alignment Monthly
- Inspect Wiring Periodically
- Test the Safety Reversal System
- Address Minor Issues Immediately
| Garage Door Repair And Inspection Done By Professionals – Call (209) 484-8977 |
Quick Queries From Our Clients
What do the colors on garage door sensor lights mean?
Garage door sensors have two indicator lights; one sensor has a steady light to show it has power, and the other indicates whether it is receiving the infrared beam. Steady indicator lights generally mean the sensors are aligned and working properly. A blinking or flashing light may mean the sensors are obstructed or misaligned.
A yellow or amber light may be normal on some models. So, you should check the manufacturer’s instructions before assuming there is a problem. Finally, if both lights are off, you need to check the power supply to the opener.
Why does my garage door go down but then come back up?
The sensor may have detected a problem if your garage door starts to close and then reverses back up. A broken beam is interpreted as an obstruction by the garage door system, so the door reverses to prevent damage. So, when you are conducting garage door sensor troubleshooting, be sure to check for misalignment or anything blocking the beam.
Can I bypass garage door sensors temporarily?
Yes, you can temporarily bypass the sensors by pressing and holding the wall button continuously until the door closes completely. This override allows the door to shut without relying on the sensors. But this should be used only in emergencies, as the sensors are a critical safety feature that prevents the door from closing on pets, people, or objects. If you find yourself bypassing the sensors frequently, you should contact a garage door company for a quick garage door sensor repair.
Final Thoughts
The next time your garage door fails to close, you will know exactly what to do. You should check for obstructions, clean the lenses, check the indicator lights, and realign the sensors. These simple steps can get your garage door working again without the need for professional help. But if the problem continues, don’t ignore it because it can compromise your garage door’s safety and hamper your daily routine. Take five minutes to inspect your sensors.
A little prevention and proper garage door maintenance can go a long way in keeping your garage door reliable and safe.
Read More About:
- How To Choose The Best Garage Doors for Modern-Style Homes?
- Creative Ways to Reuse or Recycle Your Old Garage Door
- Why Your Garage Door Gets Stuck More Often in Hot Weather
- Why Your Garage Door Looks Crooked: Cable Damage Explained
Take Control of Your Garage Door With A-Dependable Overhead Door Co.
You have places to be, work to get to, and people counting on you. The last thing you need is a garage door that refuses to close when you are already running late. If you have cleaned the sensors, checked the alignment, and the problem keeps coming back, contact A-Dependable Overhead Door Co., an experienced garage door company in Modesto.
As a BBB-accredited garage door repair company in Modesto with hundreds of loyal customers, we’re the ones you can rely on when things go south with your garage door. All our pros are knowledgeable and friendly, so you won’t have to worry about the quality and durability of our garage door repair in Modesto.
Our services include:
- Garage door repair
- Garage door replacement & installation
- Garage door designs & products
- Garage door window installation
- Lifestyle screen solutions
And the best part is that our prices are affordable, with no hidden costs, so you won’t have to worry about your budget when you need garage door services in Modesto. Call us at (209) 484-8977 to schedule your consultation with one of our professionals.